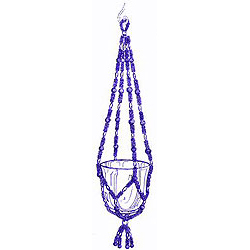
Drawings are included to assist you with this project. Click where indicated throughout the instructions to see drawings.
- Bead pattern sequences:
- Sequence A: 16 tri beads, 1 berry bead, 1 rice bead
- Sequence B: 8 tri beads, 1 rice bead, 8 tri beads
- Sequence C: 8 tri beads, 1 rice bead, 8 tri beads, 1 berry bead
1. Cut 4 pieces of beading thread or monofilament 90" long.
2. Thread beading needle with one piece of thread and double over. Knot the doubled thread about 10" from the ends. You will be working with doubled thread.
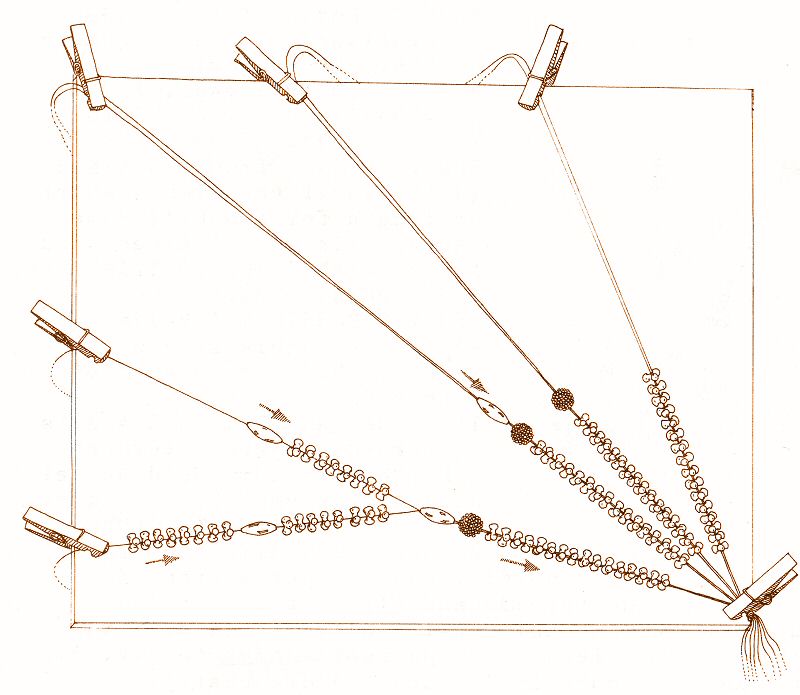 Figure 1
3. Using seq.A bead pattern slide beads onto thread. See figure 1
4. Pull thread taut and cut the thread at the needle, making 2 threads each about 45" long. This will give you 2 threads to work with. Rethread your needle with one of these threads and thread bead seq. A onto thread. Add seq. B of beads onto same thread. See figure 1
5. Secure "thread 1" (clothespins, chip clips or binder clips work well for this) and repeat step 3 on "thread 2".
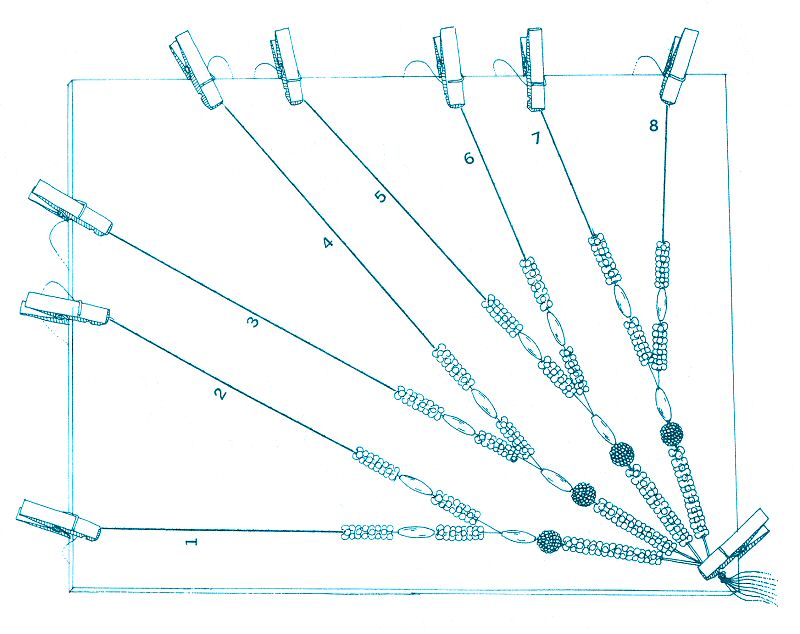 Figure 2
6. Repeat steps 2, 3, 4, and 5 on next 90" pieces of thread.
7. Knot all 4 pieces together at the original knot of each.
8. Using figure 2 numbered threads, put thread 2 and 3 together and add a berry bead onto threads.
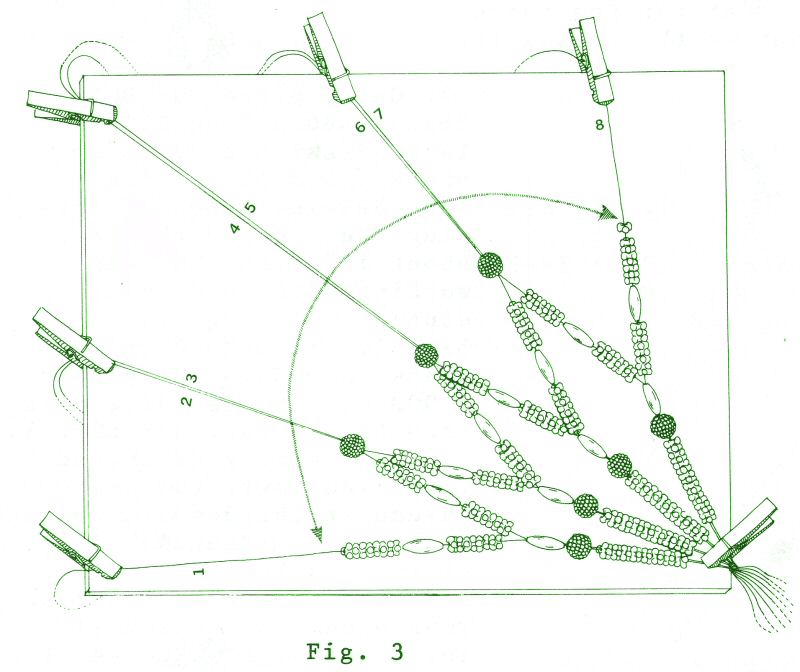 Figure 3.
9. Put thread 4 and 5 together and add a berry bead onto threads. Next put thread 6 and 7 together and add a berry bead onto threads. Next put thread 1 and 8 together and add a berry bead onto threads. See figure 3. This forms the circle for your basket in your hanger. See figure 4.
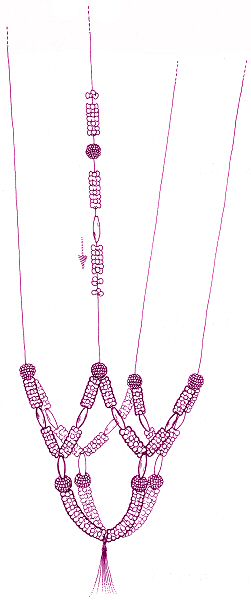 Figure 4
10. Starting with thread 1 & 8 add seq. C to threads, repeat seq. C 5 more times and finish with Seq. B. See figure 4.
11. Repeat step 9 with each of the other 3 sets of 2 threads. See figure 4.
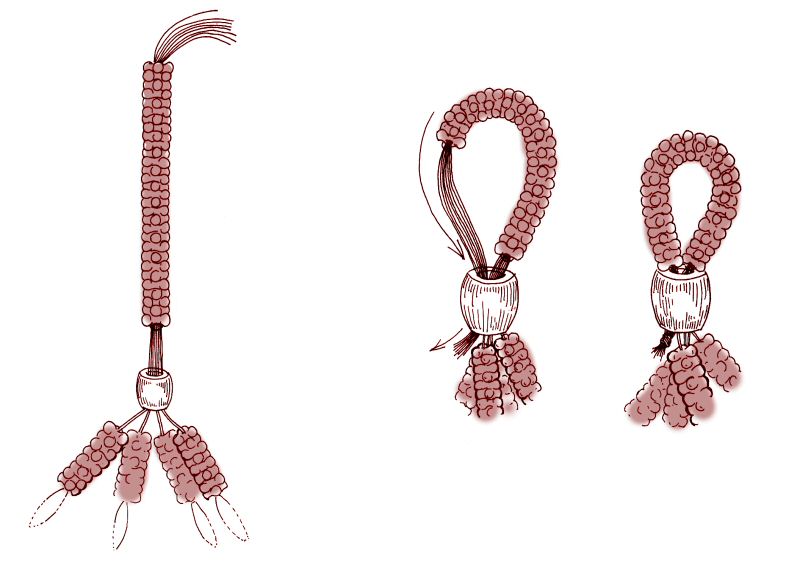 Figure 5
12. Knot all 4 sets of thread together and pull all 4 sets through a wood barrel bead. See figure 5.
13. Dip all 8 pieces of thread into white craft glue and allow it to stiffen enough so that it will go through the bead hole easily after it is dry.
14. Thread 30 tri beads onto the 8 glued pieces to form the hanger loop. See figure 5. Bring the threads back down through the barrel bead and tie off neatly. Put some craft glue on the knot and allow to dry before clipping the ends. See figure 5.
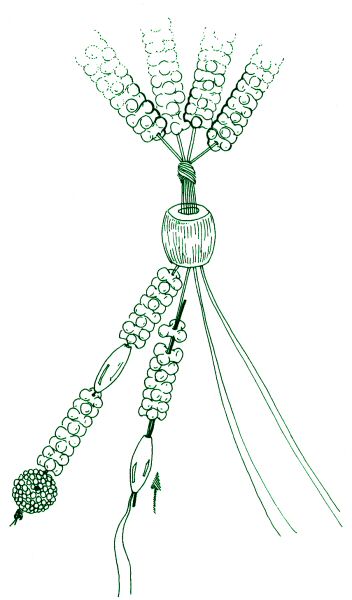 Figure 6
15. Next we will create the tassel (bottom part of hanger). See figure 6. Add glue onto bottom knot and slip other wood barrel bead over the knot.
16. Using 2 strands of thread add seq. C. Tie a triple knot in the end of your thread and put a drop of glue on end. See figure 6. Trim excess thread. Repeat with the other 3 sets of threads.
Your hanger is now ready for a potted plant or container.