Note: This pattern begins working at the top of the snowman. The illustrations in this pattern will show the project being assembled as if it were flat. Remember to work with the snowman as it will shape itself.
A few things to remember about working with beads, wire and safety pins: Put a small bend in one end of the wire so the beads do not slide off. It is important to always twist your wire ends firmly together so that your work is tight. If your wires are loose your finished snowman will be wobbly or lean to one side or the other. Always keep the safety pins going in the same direction, and go through the loop Bottom of Pin, or the head Top of Pin. Do not run your wire through the body of the pin. Check your work before closing each row. Make certain all pin assemblies are facing up and have been added in the proper sequence. Count pins from previous row to be sure none have been overlooked while adding new assemblies.
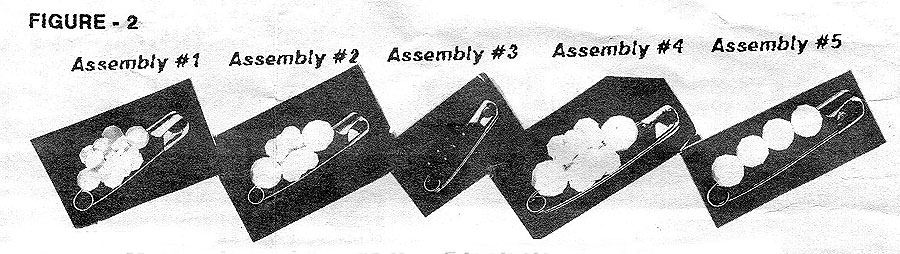
ASSEMBLIES
Assembly #1: Make 10. Use size 1 safety pins with the following pattern; 1 - 4mm faceted, 3 - 10mm starflake, 1 - 4mm faceted
Assembly #2: Make 30. Use size 2 safety pins with the following pattern; 1 - 8mm faceted, 3 - 12mm starflake, 1 - 8mm faceted
Assembly #:3 Make 30. Use size 1 safety pins with the following pattern; 4 - 6mm spacers
Assembly #4: Make 30. Use size 3 safety pins with the following pattern; 1 - 10mm faceted, 3 - 18mm starflake, 1 - 10mm faceted
Assembly #5: Make 15. Use size 2 safety pins with the following pattern; 4 - 6mm faceted
SNOWMAN
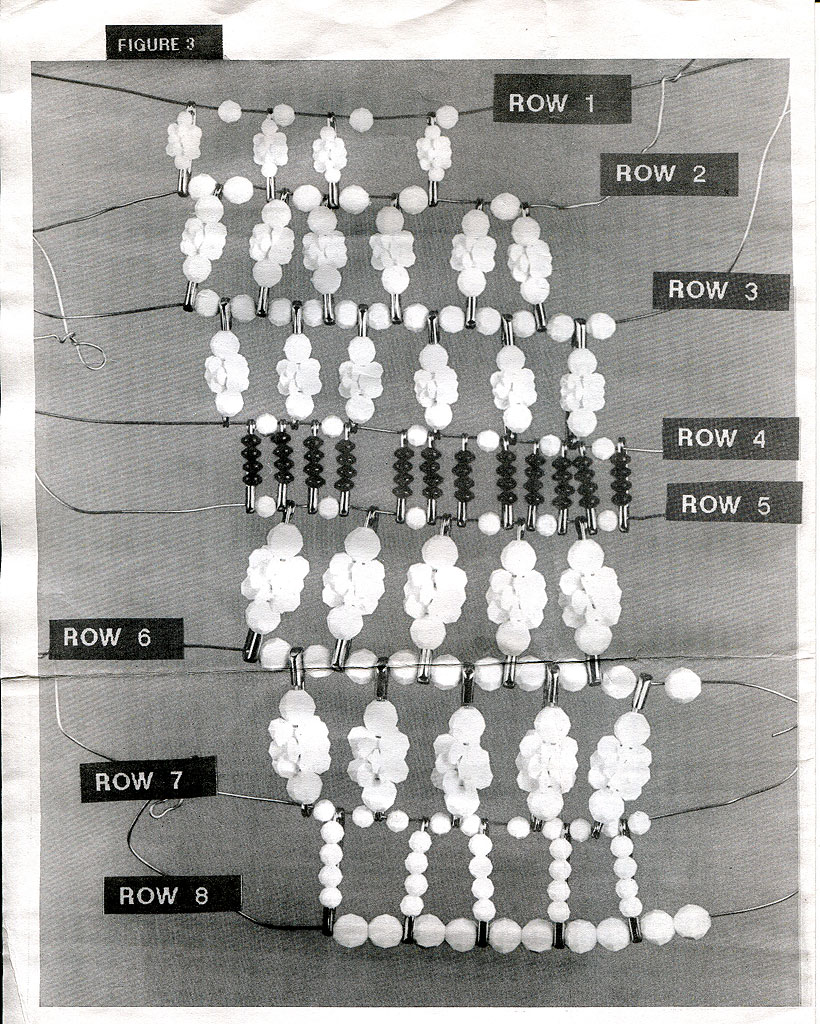
Row 1. Cut a piece of wire 6" long. Using Assembly #1, thread the bottom of the Pin in the following order: *Assembly #1, 6mm faceted bead, repeat from * (See Figure 3), until you have added 10 safety pin assemblies and 10 beads onto the wire. Close by twisting the wires firmly together. Trim with 1/4" tail and bend and twist toward center.
Row 2. Cut a piece of wire 12" long. Thread Assembly #2 and 8mm faceted beads in the following order, see figure 3. *Top of pin from 1st row, 1 - 8mm faceted, bottom of Assembly #2 pin, 1 - 8mm faceted, top of pin from 1st row, bottom of Assembly #2 pin, 1 - 8mm faceted, bottom of Assembly #2 pin, repeat from * until you have added 15 safety pin assemblies onto the wire. Close by twisting the wires firmly together. Trim with 1/4" tail and bend and twist toward center.
Row 3. Cut a piece of wire 15" long. Thread Assembly #2 and 8mm faceted beads in the following order, see figure 3. * top of pin from 2nd row, 1 - 8mm faceted bead, top of new Assembly #2 pin, 1 - 8mm faceted bead, repeat from * until you have added 15 safety pin assemblies onto the wire. Close by twisting the wires firmly together. Trim with 1/4" tail and bend and twist toward center.
Row 4. Cut a piece of wire 15" long. Thread Assembly #3 and 6mm faceted beads in the following order, see figure 3. * bottom of pin from 3rd row, bottom of new Assembly #3 pin, 1 - 6mm faceted bead, bottom of new Assembly #3 pin, repeat from * until you have added 30 safety pin assemblies onto the wire. Close by twisting the wires firmly together. Trim with 1/4" tail and bend and twist toward center. This row tends to let pins fall into the center of your snowman head. When going onto row 5 be sure to catch each of these assemblies on the wire.
Row 5. This row needs to line up with Row 4. The 6mm beads must be vertical. Look closely at Figure 3 to determine where to start. Cut a piece of wire 18" long. Thread Assembly # 4 and 6mm faceted beads in the following order, see figure 3. * Top in pin from 4th row, 1 - 6mm faceted bead, top of pin from 4th row, bottom of new Assembly #4 pin, repeat from * until you have added 15 safety pin assemblies onto the wire. Close by twisting the wires firmly together. Trim with 1/4" tail and bend and twist toward center.
Row 6. Cut a piece of wire 25" long. Thread Assembly #4 and 10mm faceted beads in the follow order, see figure 3. * top of pin from 5th row, 1 - 10mm faceted bead, top of new Assembly #4 pin, 1 - 10mm faceted bead, top of pin from 5th row, repeat from * until you have added 15 safety pin assemblies onto the wire. Close by twisting the wires firmly together. Trim with 1/4" tail and bend and twist toward center.
Row 7. Cut a piece of wire 15" long. Thread Assembly #5 and 6mm faceted beads in the following order, see figure 3. * Bottom of pin from 6th row, 1 - 6mm faceted bead, bottom of new Assembly #5 pin, 1 - 6mm faceted bead, repeat from * until you have added 15 safety pin assemblies onto the wire. Close by twisting the wires firmly together. Trim with 1/4" tail and bend and twist toward center.
Row 8. Cut a piece of wire 12" long. Add in the following order, see figure 3. * top of pin from Row 7, 2 - 10mm faceted beads, repeat from * until you have added 30 - 10mm faceted beads onto the wire. Close by twisting the wires firmly together. Trim with 1/4" tail and bend and twist toward center.
MAKING HAT AND ASSEMBLING SNOWMAN
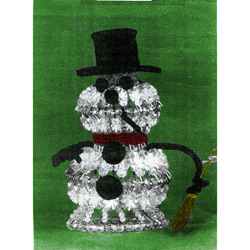
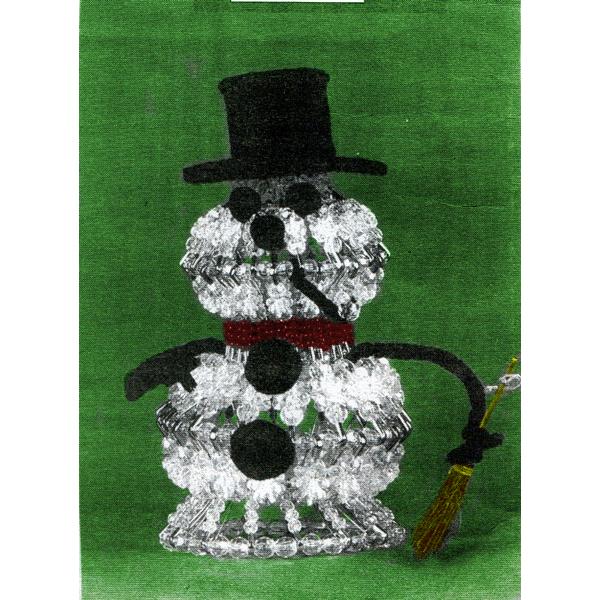
Glue pom poms into place using E-6000. Use the 1/2" pom poms for eyes and mouth. Use the 1" pom poms on the bottom half of snowman as buttons. See picture if help needed with placement.
Cut a 2 1/2" section from each chenille stem. One of thee small pieces will be the snowman's pipe. Place 1 - 10mm faceted bead onto end of stem and position on head. Make a small hook in the end which will attach to the head. Slip in and back out then twist together. Cut the second small piece of chenille stem in half for 2 hands and form by twisting onto one end of long piece of chenille. Add broom to one chenille stem. Fold in half and slip through at the side of the snowman on the bottom half of body. Bring back out and twist chenille together. Repeat for other side. To position arms and broom refer to main picture.
Glue hat onto Snowman's head. If you chose to make your own hat, cut about 1 1/2" off one end of the tissue roll and trim flat. From the sheet of cardboard cut a 2" circle for the top of the had and a 4" circle for the brim. Cover all pieces of cardboard with felt using white craft glue. Attach the crown of the hat to the broom and glue to Snowman with E-6000.