Craft Supplies - Craft Supplies Online - Buy Craft Supplies
Quality Craft Supplies Ranging From the Usual to the Not So Usual, Delivered To Your Door
Excellent Customer Service - Fast Shipping - Online since 1994!

In business since 1985. Online since 1994. We sincerely thank you for supporting family owned, family operated businesses!

Give us a call from 8am to 6pm Mon-Fri. We are available to answer questions or to take your order.
(361) 645-3325

Holiday Crystal Snowflakes - Free Christmas Craft Project Instructions

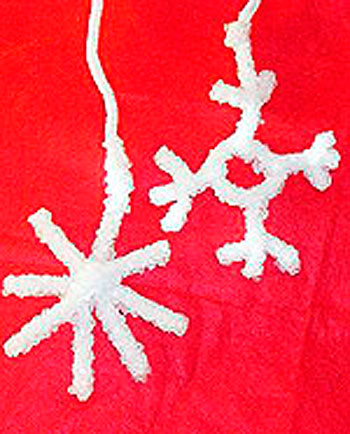
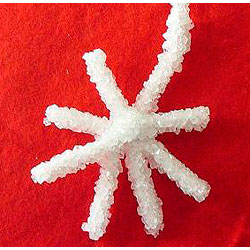
Grow your own snowflakes to use for Christmas decorations. This fun craft is easy enough for children and fun for adults too. The results are breathtaking. Make plenty to hang on the tree or give as gifts!

If you make this project please share your photos with us. With your permission we'll add it to the page and credit it to you.

Contributed by Tami Rose, with permission of Amanda Formaro
Bonus Information You Didn't Ask For
Did You Know?

Early beads were made from natural materials such as shell, bone, stone, wood and glass. With the development of synthetic plastics in the late 1800s and early 1900s, manufacturers gained a material that could be molded into beads in an enormous variety of shapes and colors. Later plastics, including acrylic, made colorful beads inexpensive, lightweight and easy to mass produce—helping turn them into the familiar craft-room staple we know today.

Gather Your Supplies

Note: To help you locate the material required for this project, some of the materials listed may be linked to this or other websites and may contain affiliate links.
  • 1 wide mouth jar
  • 3 - White pipe cleaners (chenille stems) per snowflake   (Item # 10166-10-A)
  • Boiling water
  • Borax (look in the laundry aisle for 20 Mule Team Borax Laundry Booster)
  • Pencil, straw or small rod
  • String
  • Food coloring (optional)

How To Make It

To create a snowflake shape, twist the 3 pipe cleaners together in the center to make a 6-sided figure (picture an X with a line through the middle). Trim as needed so that the snowflake will fit easily into the mouth of the jar.

Important: Adult supervision is needed when using boiling water and Borax. Please keep the Borax out of children's reach.

Fill the jar 3/4 full with boiling water. Add 3 tablespoons of Borax for every cup of water that is used. Stir until completely dissolved. It is ok if some of the Borax settles in the bottom of the jar.

You can now add food coloring to the water to create colorful snowflakes if you like.

Tie the string to one of the ends of the snowflake and the other end of the string to the pencil. Dip the snowflake into the water making sure that the string is long enough to completely cover it with water.

Rest the pencil across the top of the jar. Check to see that the snowflake floats freely not touching the sides or bottom of the jar.

Let the jar rest, undisturbed overnight (at least 8 hrs). The result is a snowflake covered in shiny crystals!

https://www.bjcraftsupplies.com - Every Pattern Deserves a Few Beads at the End
 
 
A Little Help Keeps the Patterns Coming!
The advertising on our pattern pages helps pay for maintaining our collection and adding more free patterns. If you spot an ad that interests you, please click a look! Your help supports the collection and keeps more free patterns coming. More patterns for you, a little help for us. We think that's a pretty good trade!


Still in the Mood to Make Something?
Browse even more free craft ideas and patterns at
You never know what might catch your eye!


Pin It On Pinterest


Click to verify BBB accreditation and to see a BBB report.


© Copyright, 1994-2026, BJ's Craft Supplies, sister site to Craft Supply Depot, All rights reserved, BJ's Craft Supplies.   661 Abrameit Rd, Goliad, TX  77963.
Click our phone number to call us at (361) 645-3325          p0058