Craft Supplies - Craft Supplies Online - Buy Craft Supplies
Quality Craft Supplies Ranging From the Usual to the Not So Usual, Delivered To Your Door
Excellent Customer Service - Fast Shipping - Online since 1994!

In business since 1985. Online since 1994. We sincerely thank you for supporting family owned, family operated businesses!

Give us a call from 8am to 6pm Mon-Fri. We are available to answer questions or to take your order.
(361) 645-3325

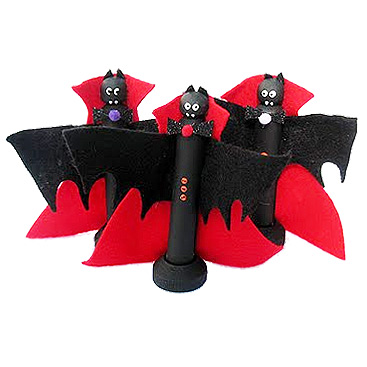
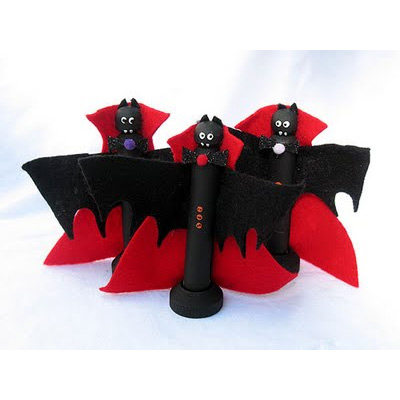
Halloween Clothespin Vampire Bat Decorations Clothespin Vampire Bats - Free Halloween Craft Instructions

These adorable little blood suckers are easily put together with some paint, a wooden clothespin and some felt. Make a whole bunch of them to line your window sill or put in a circle on the table! Great for school parties too!

If you make this project please share your photos with us. With your permission we'll add it to the page and credit it to you.

Bonus Information You Didn't Ask For
Did You Know?

Hot glue guns were originally developed for industrial use, not crafting. Hot-melt adhesives offered manufacturers a fast way to bond materials without waiting for a liquid glue to dry. Smaller, easier-to-use glue guns eventually brought the same idea into homes and craft rooms. Hot glue works a little differently from many familiar adhesives: the glue stick is melted inside the gun, applied while hot, and forms its bond as it cools and hardens—one reason it became such a useful tool for projects that need to stay put without a long drying time.

Gather Your Supplies

Note: To help you locate the material required for this project, some of the materials listed may be linked to this or other websites and may contain affiliate links.

How To Make It

Paint bases and clothespins with black acrylic craft paint. Set aside to dry, then repeat if needed.

Use the handle end of a paint brush to dot on the whites of the eyes.

Use the bristle end of the paint brushy to add white fangs.

Use a toothpick to add the black dots on the whites of the eyes.

Use the handle end of a paint brush to dot on three orange buttons in the center of the body of the clothespin.

Use a toothpick to dot on the button holes.

Let all paint dry completely before handling. Spray with acrylic sealer (this step is optional but will help your craft last longer).

Cut out patterns: red for the cape, black for ears and wings, and glitter black for the bow ties.

Cut slit on top of wing where dotted line indicates. Insert wings, flat side up, through the opening in the clothespin. Slide wings upward until the slit fits snugly against the clothespin. Glue the wings in place, you may need to hold it in your fingers for a few minutes while the glue dries.

Glue the ears to the back of the bat's head so that they stick out and can be seen from the front.

Glue the bow tie onto the front of the bat at the top of the clothespin body, just before it curves in at the neck. Glue a miniature pom pom to the center of the bow tie.

Glue the red cape to the back of the bat, lining up the collar with the neck. Glue around the sides of the neck so that the collar appears to be standing up.

Glue the clothespin body into the base and let dry.

https://www.bjcraftsupplies.com - Every Pattern Deserves a Few Beads at the End
 
 
A Little Help Keeps the Patterns Coming!
The advertising on our pattern pages helps pay for maintaining our collection and adding more free patterns. If you spot an ad that interests you, please click a look! Your help supports the collection and keeps more free patterns coming. More patterns for you, a little help for us. We think that's a pretty good trade!


Still in the Mood to Make Something?
Browse even more free craft ideas and patterns at
You never know what might catch your eye!


Pin It On Pinterest


Click to verify BBB accreditation and to see a BBB report.


© Copyright, 1994-2026, BJ's Craft Supplies, sister site to Craft Supply Depot, All rights reserved, BJ's Craft Supplies.   661 Abrameit Rd, Goliad, TX  77963.
Click our phone number to call us at (361) 645-3325          p0033