Cut WHITE canvas as follows:
- 14 pieces that are 1 hole x 66 holes
- 50 pieces that are 9 holes x 8 holes
- 2 pieces that are 3 holes x 21 holes
- 14 pieces that are 3 holes x 66 holes
- 2 pieces that are 1 hole x 21 holes
- 12 pieces that are 8 holes x 20 holes
- Also, cut 4 pieces 5 x 6 holes and shape as shown in fig. 1 below.
- And cut 3 pieces 4 x 6 holes and shape as shown in fig. 2 below.
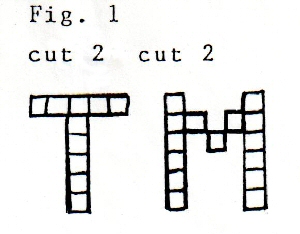
Figure 1
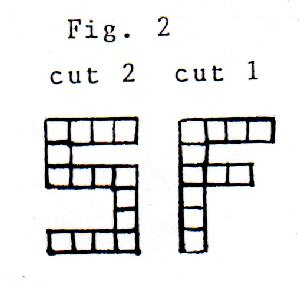
Figure 2
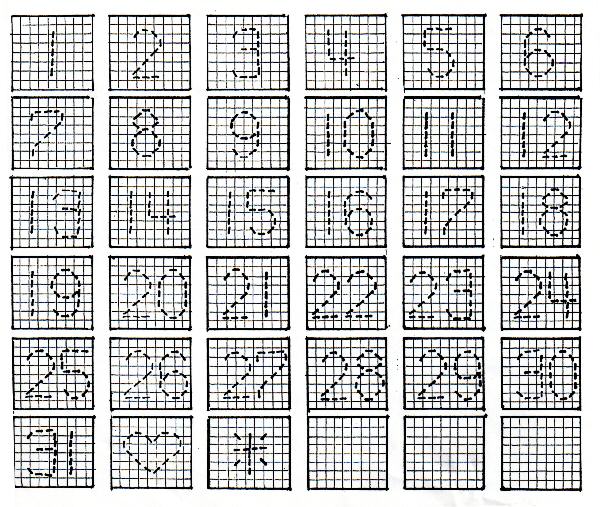
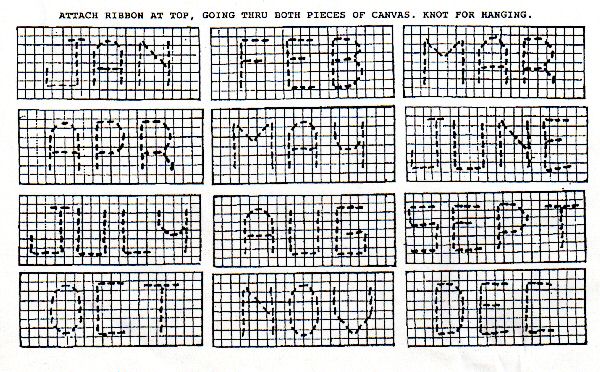
Stitch numerals and months with backstitch, using yarn (color of your choice) on white canvas, according to graphs at bottom of page.
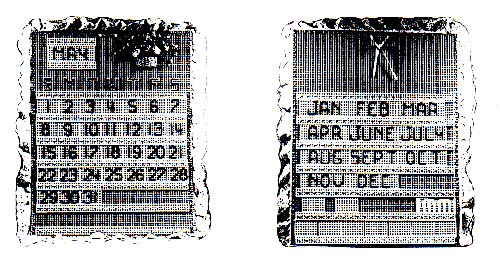
Attach weekday letters with colored yarn using backstitch, going through both white letter and colored canvas. Do not overcast edges of letters, as this causes a bulky appearance. Place letters as in Fig. 3 below.

Figure 3
Baste runners (1 x 66) in place with sewing thread on colored canvas starting in 28th hole down, 3rd hole in from the left. Repeat for each runner, stitching in 10th hole down for each row.
Place dividers (3 x 66) over runners and stitch as in Fig. 4 below, using a long running stitch thru the center hole with colored yarn.
Attach dividers and runners for current month at top of calendar, using same method as above. Begin 1st row in 5th hole down from top, 8th hole in from left. Place 2nd row in 10th hole down from first row. See diagram.
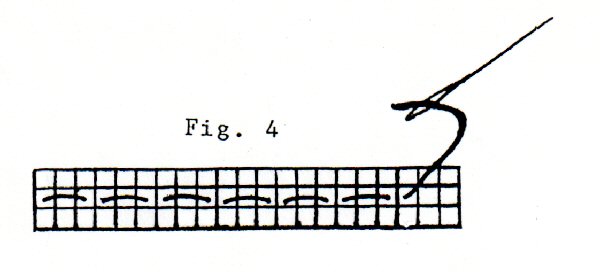
Figure 4
Overcast edge of colored canvas (just the top piece) with colored yarn.
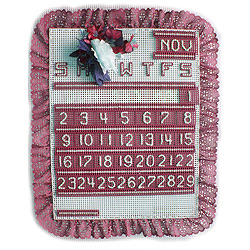
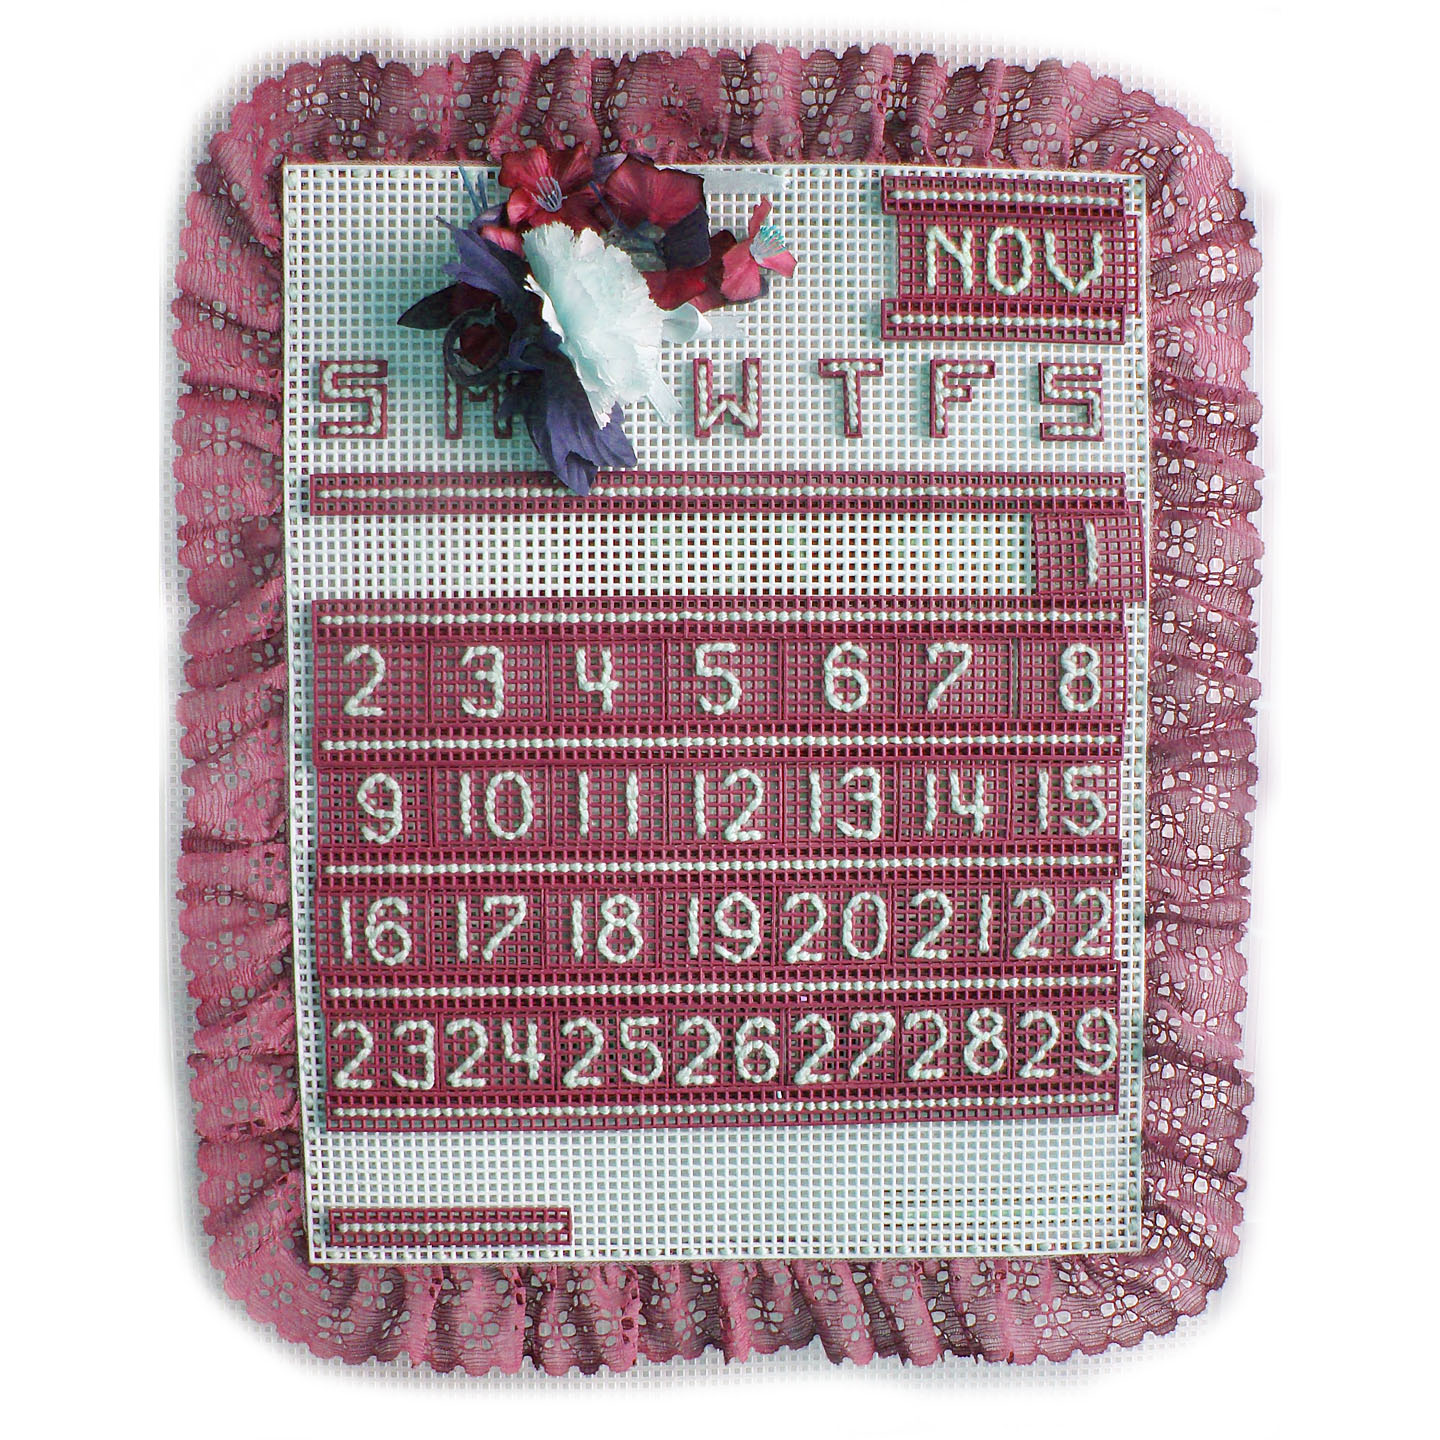
Now, using the 2nd piece of colored canvas, attach the runners and dividers the same as on the front, see photo.
Glue eyelet to underside of yarn on outside edges of calendar. See diagram.
When glue is dry attach top and bottom pieces of colored canvas together with colored yarn using a running stitch. Be careful to match holes so edges are even.
Cut basket in half and glue to canvas. Glue flowers in place.
Extra pieces (9 x 8) are to use for special occasions. I have designed a few, but I am sure you will want to do some of your own. A nice touch is to glue appropriate miniatures instead of stitching, or perhaps a wedding ring or two for an anniversary. Tiny pre-painted wood pieces work well for many occasions. Glue on a tiny quilt piece.
