Craft Supplies - Craft Supplies Online - Buy Craft Supplies
Quality Craft Supplies Ranging From the Usual to the Not So Usual, Delivered To Your Door
Excellent Customer Service - Fast Shipping - Online since 1994!

In business since 1985. Online since 1994. We sincerely thank you for supporting family owned, family operated businesses!

Give us a call from 8am to 6pm Mon-Fri. We are available to answer questions or to take your order.
(361) 645-3325

Instructions for Safety Pin Bracelet with Acrylic Beads from Craft Supply Depot - Safety Pin Jewelry Instructions - Free Instructions - Free Jewelry Craft Project Ideas

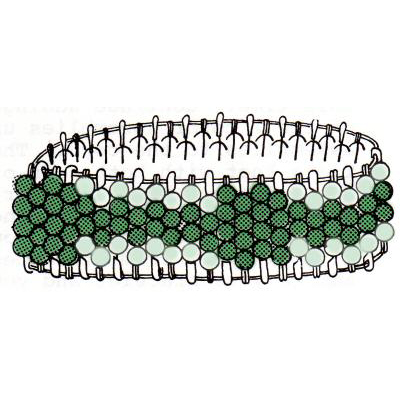
Safety pin jewelry is a great way to create unique pieces to match your wardrobe. This variation is made with 4mm acylic faceted beads in the colors of your choice. Your friends will be surprised when you tell them it is made with safety pins.

If you make this project please share your photos with us. With your permission we'll add it to the page and credit it to you.

Bonus Information You Didn't Ask For
Did You Know?

Googly eyes are also known as wiggle eyes, and not all of them have to be glued in place. While the familiar flat-backed versions can be glued onto a project, some wiggle eyes have a shank on the back, much like a button, so they can be sewn onto fabric and other materials.

Gather Your Supplies

Note: To help you locate the material required for this project, some of the materials listed may be linked to this or other websites and may contain affiliate links.

How To Make It

Bead Sequence for Safety Pin Bracelet - Safety Pin Jewelry

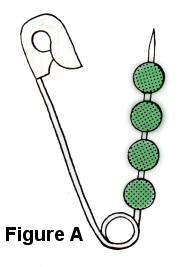
Make 20 - Thread beads onto pin using the pattern in Figure A. Dip the end of the safety pin in glue and close pin.
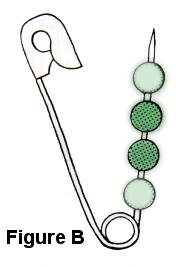
Safety Pin Jewelry - Bead Sequence for Safety Pin Bracelet

Make 40 - Thread beads onto pin using the pattern in Figure B. Dip the end of the safety pin in glue and close pin.

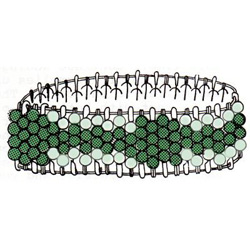
Cut 2 lengths of your cord, approximately 8" to 12" long. Slide one length of cord through the hole in the bottom of a finished safety pin, then through the hole in the head of the next safety pin. Continue stringing safety pins, alternating threading the head and the bottom of the pin until desired length. Securely tie the ends of the threaded stretch cord and dot knot with glue. Trim cord and tuck remaining ends back into the holes of the safety pins and secure with a spot of glue onto the inside of one of the safety pins.

Thread the second piece of stretch jewelry cord through the opposite end of each pin, making sure to string them in the same order as they are on the first cord. Knot securely, trim and dot knot with glue, tuck remaining ends into the safety pin holes and hold with a spot of glue in the inside of one of the safety pins.

https://www.bjcraftsupplies.com - Every Pattern Deserves a Few Beads at the End
 
 
A Little Help Keeps the Patterns Coming!
The advertising on our pattern pages helps pay for maintaining our collection and adding more free patterns. If you spot an ad that interests you, please click a look! Your help supports the collection and keeps more free patterns coming. More patterns for you, a little help for us. We think that's a pretty good trade!


Still in the Mood to Make Something?
Browse even more free craft ideas and patterns at
You never know what might catch your eye!


Pin It On Pinterest


Click to verify BBB accreditation and to see a BBB report.


© Copyright, 1994-2026, BJ's Craft Supplies, sister site to Craft Supply Depot, All rights reserved, BJ's Craft Supplies.   661 Abrameit Rd, Goliad, TX  77963.
Click our phone number to call us at (361) 645-3325          p0026